Getting Started
See MoreView Transcript
Transcript
SUPER/VO:
Before you administer VYALEV, you should be shown how to do it correctly by a healthcare provider.
This demonstration is intended to help you become familiar with the VYALEV delivery system and be used as a supplemental resource as you make infusing VYALEV part of your routine. Before you start VYALEV for the first time, and also each time you get a refill, please use the Medication Guide and the Instructions for Use materials that came with your drug vials, pump and other supplies from your Specialty Pharmacy. Use VYALEV exactly as your healthcare provider tells you to use it.
SUPER/VO:
USE
VYALEV is a prescription medicine used for treatment of advanced Parkinson's disease in adults. VYALEV contains two medicines, foscarbidopa and foslevodopa.
SUPER:
Please see Important Safety Information included in this video. Please see Instructions For Use, and full Prescribing Information, along with Medication Guide, which was provided with your pump.
SUPER:
How to Use Your Delivery System
JANE:
Hi! I’m Jane. I’m looking forward to helping you today.
(VO) JANE:
I’d like to talk to you about using the VYALEV Delivery System.
JANE:
You were trained on how to use your system at the doctor’s office. This video will help you remember what you learned.
You’ll receive some Instructions for Use materials with the pump and supplies.
(VO) JANE:
They explain the different supplies and how to use them, so read them over before beginning.
JANE:
You’ll also have your own dedicated VYALEV Complete Nurse Ambassador. They’ll be your go-to person for support throughout your VYALEV treatment...
SUPER:
Nurse Ambassadors are provided by AbbVie and do not work under the direction of your health care professional (HCP) or give medical advice. They are trained to direct patients to their HCP for treatment-related advice, including further referrals.
JANE:
...and will visit you at home to help you practice.
SUPER:
Your Nurse Ambassador will visit you at home
Nurse Ambassadors are provided by AbbVie and do not work under the direction of your health care professional (HCP) or give medical advice. They are trained to direct patients to their HCP for treatment-related advice, including further referrals.
JANE:
Learning your new VYALEV delivery system may take some time, but with practice and patience, you’ll get there.
JANE:
First, we’ll go over the 5 phases of setting up your infusion. You can remember them as the 5 Ps: Plan It Out, Prepare the Syringe, Prime the Tubing, Place the Cannula, and Pump the Medication.
SUPER:
The 5 Ps
[icon] Plan It Out
[icon] Prepare the Syringe
[icon] Prime the Tubing
[icon] Place the Cannula
[icon] Pump the Medication
(VO) JANE:
First is the Plan It Out phase. Here you will check your supplies and get ready to begin.
SUPER:
The 5 Ps
[icon] Plan It Out
[icon] Prepare the Syringe
[icon] Prime the Tubing
[icon] Place the Cannula
[icon] Pump the Medication
(VO) JANE:
Second is the Prepare the Syringe phase. In this phase, you transfer the medication from the vial to the syringe.
SUPER:
The 5 Ps
[icon] Plan It Out
[icon] Prepare the Syringe
[icon] Prime the Tubing
[icon] Place the Cannula
[icon] Pump the Medication
(VO) JANE:
The third phase is Prime the Tubing— you’ll fill the infusion tubing with the medication.
SUPER:
The 5 Ps
[icon] Plan It Out
[icon] Prepare the Syringe
[icon] Prime the Tubing
[icon] Place the Cannula
[icon] Pump the Medication
(VO) JANE:
The fourth is Place the Cannula. You’ll put the cannula into the skin of your belly and connect the tubing.
SUPER:
The 5 Ps
[icon] Plan It Out
[icon] Prepare the Syringe
[icon] Prime the Tubing
[icon] Place the Cannula
[icon] Pump the Medication
(VO) JANE:
And fifth phase is Pump the Medication. You’ll start the pump for your continuous infusion and use its carrying case.
SUPER:
The 5 Ps
[icon] Plan It Out
[icon] Prepare the Syringe
[icon] Prime the Tubing
[icon] Place the Cannula
[icon] Pump the Medication
JANE:
Then, we’ll go over instructions you’ll need to follow when certain situations come up, like how to use the different settings on your pump, what you need to do when you shower, and more. At the end, we’ll look at your VYALEV Complete resources and talk about how they can help.
SUPER:
The 5 Ps
[icon] Plan It Out
[icon] Prepare the Syringe
[icon] Prime the Tubing
[icon] Place the Cannula
[icon] Pump the Medication
Additions to Your Routine
VYALEV Complete Resources
JANE:
Let’s get started.
(VO) JANE:
The first phase is to Plan It Out.
SUPER:
Phase 1: Plan It Out
(VO) JANE:
First, wash your hands thoroughly with soap and water for at least 20 seconds. Scrub the front and back of both hands, between your fingers, and under your nails. Dry them with a new paper towel. We’ll wash our hands and clean our workspace a few times as we go along.
SUPER:
Wash hands thoroughly for 20 seconds
Scrub:
- Front and back of hands
- Between fingers
- Under your nails
Dry with new paper towel
JANE:
This is called aseptic technique. That’s just a medical term for making sure everything we touch stays as clean as possible.
Keeping you and your workspace clean can help reduce the risk of infection and irritation at your infusion site.
SUPER:
Aseptic technique = practicing your clean routine
(VO) JANE:
Next, grab your medication vial.
If it was in the fridge, be sure to let it sit at room temperature for 30 minutes before you use it. Don’t warm the medication up any other way. Just remember to keep it out of direct sunlight.
SUPER:
[icon] If refrigerated, let medication sit at room temperature for 30 minutes.
[icon] It can be kept at room temperature for up to 28 days.
(VO) JANE:
Next, we’ll make some space to work. You can use any flat surface. Be sure to thoroughly clean the area and dry it with a new paper towel.
SUPER:
Clean your workspace
(VO) JANE:
Next, gather your supplies. Then we’ll check that they’re safe to use. When gathering your supplies...
SUPER:
Gather and inspect supplies
JANE:
...be sure to keep them in their packaging until you are ready to use them.
SUPER:
Keep supplies in packaging until ready to use
(VO) JANE:
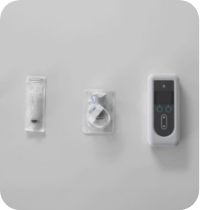
Here’s your pump, medication vial, vial adapter, and syringe. Your infusion set includes your tubing, cannula insertion device, and cannula all in the same package. You’ll also want to grab a new paper towel and alcohol pads. The only other thing you’ll need is a fully charged pump battery.
SUPER:
Pump, Medication Vial, Vial Adapter, Syringe, Infusion Set, New Paper Towel, Alcohol Pads, Battery
Optional: Consider using transparent film dressing to ensure the infusion set stays in place.
JANE:
Be sure that you have some extra supplies nearby in case you need them.
(VO) JANE:
Take a look at the packaging on each of the supplies, and check for damage and expiration dates.
JANE:
If something’s damaged or expired, don’t use it. Contact your Specialty Pharmacy for replacements. Inspect your medication vial, too. Be sure the vial reads “VYALEV.”
SUPER:
A Specialty Pharmacy is a type of pharmacy that handles medication for conditions like advanced Parkinson’s. These medications often need special storage and processing.
JANE:
The color might be different from the one we have here. That’s okay.
JANE:
But the solution should not be cloudy. You shouldn’t see any particles or flakes floating in it.
If the solution doesn’t look right, don’t use that medication vial.
SUPER:
The medication vial...
[X] Should not be cloudy
[X] Should not have particles or flakes
[X] Should not be expired
If the solution doesn’t look right, don’t use that vial
JANE:
You’ll also need to put a fully charged battery in your pump. Your pump comes with 2 batteries. Always keep one charging while the other is being used in your pump. This way, you’ll have a fully charged battery ready when you need it.
SUPER:
Refer to your Battery Charger Patient Instructions for Use for more information.
Always keep one battery charging
(VO) JANE:
Match the metal strips between the battery and battery compartment, and insert the battery. You’ll hear a “CLICK” when the battery is in place. Once installed, you’ll hear the pump make some start-up sounds as it gets ready for use.
(VO) JANE:
Now, wash your hands a second time. We want to make sure our hands are as clean as possible before we use our supplies.
SUPER:
Wash hands again with soap and water for 20 seconds
(VO) JANE:
Dry them with a new paper towel.
SUPER:
Dry with a new paper towel
(VO) JANE:
That was phase 1—Plan It Out. Here’s a quick summary. Feel free to pause the video if you’d like to review the steps, or go back if you’d like to re-learn this phase.
SUPER:
Let’s review phase 1: Plan It Out
- Wash your hands thoroughly
- Grab your medication vial. If it was refrigerated, let it sit at room temperature for 30 minutes
- Clean your workspace
- Gather and inspect your supplies
- Wash your hands thoroughly a second time
(VO) JANE:
The second phase is “Prepare your Syringe.”
SUPER:
Phase 2: Prepare the Syringe
JANE:
In this phase, you’ll get your medication ready to use and place the filled syringe in the pump.
SUPER:
Refer to your Instructions for Use of VYALEV.
(VO) JANE:
Take off the medication vial’s cap. Then, use one of your alcohol pads to clean the top of the vial. Give it 5 seconds to air-dry. This helps ensure everything stays as clean as possible.
SUPER:
[Clock icon]
Allow 5 seconds to dry
(VO) JANE:
This is the vial adapter. It attaches to the top of your medication vial. It helps you transfer the medication from the vial into the syringe.
SUPER:
Refer to your Vial Adapter Patient Instructions for Use.
(VO) JANE:
Leave the vial adapter in the outer protective packaging. Peel back the cover, like this.
(VO) JANE:
Hold the vial in one hand, on a flat workspace. Then, hold the adapter by the outer protective packaging in the other hand, and place it on top of the vial. Press down until you hear a SNAP sound. That’s how you know you did it right!
JANE:
Once you insert the vial adapter, the outer protective packaging can come off. The vial adapter will still be attached. You can throw the packaging away in your regular trash.
(VO) JANE:
Take care not to touch the exposed end of the vial adapter.
SUPER:
Don’t touch exposed end of the vial adapter
(VO) JANE:
The syringe is used to draw out the medication from the vial. Take the syringe out of its package.
(VO) JANE:
Make sure you don’t touch the syringe tip to any unclean surfaces to help avoid contamination. If it does touch, throw it away and get a new one.
SUPER:
If the syringe tip touches an unclean surface, you’ll need to discard it and get a new one
(VO) JANE:
Be certain the plunger is pushed in all the way. This makes sure all the air is out, so you can fill the syringe with your medication.
SUPER:
Push plunger all the way in
(VO) JANE:
Hold your syringe vertically, with the tip pointing down. Press the tip into your vial adapter to insert it. Turn it clockwise as you go.
SUPER:
Don’t overtighten
JANE:
Once the syringe is inserted, flip it so the vial is on top, like this. Then, pull the plunger slowly all the way down. Withdraw the full contents of the vial into...
SUPER:
Withdraw all the medication
(VO) JANE:
...the syringe to around the 12 mL mark. You will see air at the tip of the syringe.
SUPER:
Withdraw all the medication
12mL
JANE:
Next, check for large air bubbles. They may form when filling the syringe with the medication.
(VO) JANE:
The tiny air bubbles may be hard to get out. That’s okay. It’s these larger ones you’ll want to make sure to remove.
They may affect your dosage and delay your medication’s flow. Let’s get rid of those bubbles.
SUPER:
Check for large air bubbles
(VO) JANE:
Slowly and gently rotate and tilt the syringe, like this. Do this a few times.
SUPER:
Remove large air bubbles
(VO) JANE:
You’ll know you’re doing it right when the air bubbles start to gather at the tip.
SUPER:
Air bubbles will gather and disappear
(VO) JANE:
Do not shake or tap the syringe to remove the air bubbles.
SUPER:
Don’t shake or tap the syringe
(VO) JANE:
If the air bubbles won’t budge, hold the syringe vertically, with the tip facing down. Then rotate it so the tip is facing up. Gently turn it back and forth a few times.
JANE:
You’ll push out the air that gathered here. Slowly press the plunger in. This will push the air out of your syringe and into the vial. Keep the syringe straight and try not to tilt it. This prevents another air bubble from forming. Continue pushing until all of the air is pushed out of the syringe and into the solution vial...
(VO) JANE:
...and there is solution visible in the syringe tip. You might feel some resistance. That’s normal, keep going! Stop pressing the plunger when all the air is out.
(VO) JANE:
Flip the syringe and vial so that the vial is right side up on the table. Now gently pull and turn the syringe counterclockwise to take it out. Be careful not to push the plunger or else the solution will leak. And that’s it! The syringe is ready.
(VO) JANE:
Make sure to lay the syringe down carefully, without touching the tip to any unclean surface. If it does touch, throw it away and get a new one.
SUPER:
If the syringe tip touches an unclean surface, discard it and get a new one
JANE:
Next, we’ll connect the tubing, syringe, and pump together.
SUPER:
Refer to your Infusion Set Patient Instructions for Use.
(VO) JANE:
The infusion tubing is a long, thin tube that allows your medication to flow from the pump.
SUPER:
Refer to your Infusion Set Patient Instructions for Use.
Infusion tubing
(VO) JANE:
It’s packaged with your cannula insertion device. Take the tubing out of its package and remove the paper. You’ll notice that your tubing has 2 different ends.
SUPER:
Cannula insertion device
(VO) JANE:
This end is called the site connector. It’ll attach to the cannula on your belly.
SUPER:
If the tubing ends touch an unclean surface, you’ll need to discard it and get a new one.
Site connector
(VO) JANE:
This end is called the pump connector. It attaches to the syringe tip.
SUPER:
If the tubing ends touch an unclean surface, you’ll need to discard it and get a new one.
Pump connector
(VO) JANE:
Hold your syringe with the tip pointing up. Take the pump connector end of the tubing. Attach it to the syringe by pressing and turning it clockwise.
(VO) JANE:
Now we’ll place the syringe inside your pump. Press any button to turn the pump display screen on. First press the MENU button. You’ll see a few options. Highlight “Insert Syringe” and press “Select.” Slide the latch to open the pump’s lid.
SUPER:
Refer to your VYALEV Pump Patient Instructions for Use.
(VO) JANE:
Line up the syringe with the grooves inside the pump. The tip that’s connected to your tubing will stick out. Close the lid. When you hear a SNAP sound—just like that! —it’s fully closed and you’re ready to keep going!
(VO) JANE:
Click “Yes” to confirm the syringe is inside. The pump will prepare your medication for use!
(VO) JANE:
If the syringe does not fit inside the pump, check to see if the syringe plunger rod pusher in the pump has moved to the correct position. Or check to see if the air or headspace has been removed from the syringe.
SUPER:
Check the syringe plunger rod pusher
Check that the air or headspace has been removed
(VO) JANE:
That’s all for phase 2—Preparing the Syringe. Here’s a quick summary. Again, feel free to pause the video if you’d like to review the steps, or go back if you’d like to re-learn this phase.
SUPER:
Let's review phase 2: Prepare the Syringe
- Use the vial adapter to transfer medication from the vial to the syringe
- Connect the tubing to the syringe
- Place the filled syringe in your pump. Follow the on-screen prompts to confirm the syringe is in
(VO) JANE:
Next, we'll prime the tubing. But before I show you how to prime...
SUPER:
Phase 3: Prime the Tubing
(VO) JANE:
...I'll explain what it means and why it's important. Priming is when you fill the infusion tubing with your medication, before connecting it to your body.
SUPER:
Refer to your VYALEV Pump Patient Instructions for Use.
Priming = filling new tubing with medication
(VO) JANE:
A small amount of medication will flow through the tubing, out of the site connector and onto a new paper towel. You'll need to prime whenever you use new tubing. Let's take a look at how to do it.
(VO) JANE:
Press any button to turn on your pump. The display screen will ask if you'd like to prime the tubing. Click “Yes.” The display screen will then ask you to confirm that the tubing is not connected to the cannula. It should not be connected when priming. Click “Confirm.”
(VO) JANE:
We just connected one end of the tubing to the syringe. The other end of the tubing is called the “site connector.” Take off the site connector's cover by squeezing the sides and sliding it off.
SUPER:
Site connector (graphic circle/line to accompany this)
JANE:
Keep it in a safe place where it'll stay clean. You'll need to cover the site connector if you disconnect from the pump for any reason, like to shower. Then, place the site connector on a new paper towel.
SUPER:
- Keep it in a safe place where you will remember it
- It's used again when you disconnect from the pump
(VO) JANE:
Now, hold the pump with the syringe tip facing up, and press “Prime” once. If the pump is not straight up, the “Prime” option will not be available.
SUPER:
Must hold pump straight up to prime
(VO) JANE:
Each time you press “Prime”, medication will push through the tubing from the syringe toward the site connector end.
(VO) JANE:
Press the button once, and wait to see a drop of medication on the paper towel. If you don't see it after a few moments, press “No” on the pump to prime again.
(VO) JANE:
The medication will eventually reach the end of the tubing and drip onto the paper towel. That means you're doing it right!
JANE:
Your tubing is now primed. Press “Yes.” Lay your pump flat on the table. Wait at least 1 minute to make sure the solution stops dripping from the site connector.
SUPER:
[Clock icon] Wait 1 minute
(VO) JANE:
Then, without lifting the site connector from the paper towel, gently tap the tubing right where it meets the site connector to shake off any drops of medication.
JANE:
If we don't shake the droplets off, they could make your site connector sticky and a bit difficult to remove from the cannula. We'll learn more about that later on.
JANE:
That's it! The tubing is primed and ready. Now, it's important to remember: you do not need to do this every time you change a syringe. Only prime when you are changing the tubing. Your tubing should be changed every time you change your cannula.
SUPER:
Only prime when changing the tubing
(VO) JANE:
And we're done with phase 3—Priming the Tubing. Here's a quick summary. Feel free to pause the video if you'd like to review the steps, or go back if you'd like to re-learn this phase.
SUPER:
Let's review phase 3: Prime the Tubing
- Lay the site connector on a new paper towel
- Use your pump to prime. You'll do this whenever you use new tubing
(VO) JANE:
Next, we'll insert the cannula.
SUPER:
Phase 4: Place the Cannula
JANE:
The cannula is inside this insertion device, which helps you put it into the skin of your belly. The tubing will attach to the cannula so the medication can be delivered under the skin.
(VO) JANE:
For demonstration purposes, I'll show you how to insert the cannula using a foam belly. But before that, we need to choose a spot to insert the cannula. This spot is called the “infusion site.” The preferred infusion site is on your belly. In some cases, your doctor may recommend inserting the cannula into another part of the body. Talk to your doctor about what's right for you.
SUPER:
The belly is the preferred infusion site. Speak to your doctor about what infusion site is right for you.
Preferred Infusion Site
JANE:
Avoid skin that doesn't look normal. You'll also want to avoid areas where clothing might get in the way, like your waist. Choose sites with the least risk of being impacted by physical activity, to prevent your cannula from being knocked out. If needed, remove hair around the insertion site. This will make sure the tape on the cannula stays secure.
SUPER:
Choose an infusion site 2 inches away from skin that
- Is tender, bruised, red or hard to the touch
- Naturally bends, creases or has folds
- Has significant sweat
- Might interfere with clothing and cause irritation
- Has body hair. Remove any body hair before inserting the cannula
(VO) JANE:
Insert the cannula at least 2 inches away from your belly button. The distance from your fingertip to your knuckle is about 2 inches. Use that as a guide when placing your cannula.
SUPER:
2”
JANE:
Rotate the infusion site by choosing an area that is at least 1 inch from previous sites used in the last 12 days.
SUPER:
At least 1 inch away from previous sites used in the last 12 days
Rotate your infusion site at least once every 3 days, or more frequently as directed by your doctor.
(VO) JANE:
The distance from the tip of your thumb to your knuckle is about 1 inch.
SUPER:
1”
(VO) JANE:
Wash the infusion site with soap and water.
SUPER:
Wash infusion site with soap and water
(VO) JANE:
Then, use an alcohol pad to wipe the insertion area in an outward spiral, not back and forth, to avoid moving bacteria onto the site. Do not blow on it.
SUPER:
Wipe your skin
JANE:
Instead, let it air-dry for at least 1 minute so that the tape on the cannula can stick to the skin properly.
SUPER:
[icon] Wait 1 minute to air-dry
(VO) JANE:
The cannula insertion device will help you put the cannula in the skin of your belly. When you press this button at the top, it'll insert the cannula under your skin.
SUPER:
Refer to your Infusion Set Patient Instructions for Use.
JANE:
Right now, the button has this safeguard on it. This makes sure we don't accidentally press the button before we're ready to insert the cannula.
(VO) JANE:
The arrows running down the side indicate where the tubing will be connected after insertion.
(VO) JANE:
On the bottom there's a piece of paper covering up tape. It's like the paper that covers the tape on a bandage. Let's see how it works!
(VO) JANE:
First, remove the paper from the bottom to expose the adhesive tape. Gently pull it in a circular motion so the tape doesn't stick to itself.
(VO) JANE:
Next, take off the safeguard at the top. Gently squeeze the sides and pull it straight out.
JANE:
Keep the safeguard in a clean, safe place, with the site connector cover we removed before. You'll need both when you disconnect from your pump.
SUPER:
Store in a clean, safe place
(VO) JANE:
Note the arrows on the insertion device. This shows the side of the cannula where the tubing will be connected.
(VO) JANE:
With the insertion device in one hand, use the other to gently stretch your skin. This will create a taut, flat surface. Then, hold the insertion device against your skin. Now press this red button down completely to insert the cannula. It will make a “CLICK” sound as it's inserted. Just like that!
(VO) JANE:
Keep the device pressed against your skin for 5 seconds to make sure the tape sticks. Then, carefully pull the insertion device away from your body.
SUPER:
[Clock icon]
Press for 5 seconds
JANE:
The cannula and the tape will stay on your skin. Press the tape down to make sure it's secure. Then, dispose of the insertion device properly in a sharps disposal container.
SUPER:
A sharps container is a recycling bin for used needles and other medical supplies.
JANE:
Even if you unsuccessfully insert the cannula, don't reinsert in the same site again or reuse the same cannula.
Get a new, unused insertion device and place the new cannula in a different location. Be sure to use a new insertion device at a new infusion site if the adhesive tape becomes loose or if it needs to be readjusted or replaced.
(VO) JANE:
Now we'll connect the tubing to the cannula. We'll do this by inserting the site connector end into the cannula that we just placed on your belly. Place a finger on the cannula housing and push the site connector in. You'll know you inserted it fully when you hear a CLICK sound. This is important to help prevent any medication from leaking out.
JANE:
Now your VYALEV delivery system is fully connected!
Be sure to frequently check your infusion site to ensure the cannula remains in place, that fluid isn't leaking onto the skin and that the site is not irritated. If you experience any redness, pain or swelling, be sure to replace the cannula in a new infusion site and call your doctor.
SUPER:
Check infusion site often
- Cannula stays in place
- No leaking
- No irritation
JANE:
You can change your cannula as often as you need to. But it should be changed at least every 3 days or more frequently as directed by your doctor.
SUPER:
[icon] Replace your tubing and cannula at least once every 3 days, or more frequently as directed by your doctor
(VO) JANE:
That's it for phase 4: Placing the Cannula. Here's a quick summary. Feel free to pause the video if you'd like to review the steps, or go back if you'd like to re-learn this phase.
SUPER:
Let's review phase 4: Place the Cannula
- Choose an infusion site on your belly
- Prepare the site
- Place the cannula with the cannula insertion device
- Attach the tubing to the cannula on your body
(VO) JANE:
We made it to the last phase—starting and using your pump.
SUPER:
Phase 5: Pump the Medication
(VO) JANE:
Press any button to turn your pump on. Press “Continue”. Then press YES. The screen will time out after 20 seconds of inactivity. But the pump won't turn off unless the battery is removed. Your pump will now start doing its job—giving you your medication.
SUPER:
Refer to your VYALEV Pump Patient Instructions for Use.
(VO) JANE:
The pump screen will say “Running” in green at the top corner when the medication is flowing. That's how you know you did it right! Your continuous infusion is in progress. Your medication will flow until your syringe runs out.
SUPER:
Pump status
(VO) JANE:
The screen will also show a countdown of the time left until you need to replace the syringe with new medication.
The time shown is dependent on the dose your doctor prescribed.
JANE:
Keep in mind, once the medication is taken out of the vial, it must be used within 24 hours, or thrown away.
SUPER:
Medication must be used and syringe must be replaced within 24 hours.
JANE:
Check on the cannula often. It should not be loose or leaking. The skin around the infusion site shouldn't be irritated. If you're having a skin reaction or irritation, remove the cannula and call your doctor. If your doctor advises to change your cannula, be sure to use a new site at least 2 inches away from the area of irritation.
(VO) JANE:
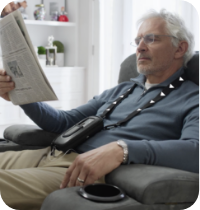
You also received this carrying case with your pump. Your pump goes in the case, and the strap allows you to wear it throughout your day.
SUPER:
Refer to your VYALEV Carrying Accessory Patient Instructions for Use.
(VO) JANE:
Unzip the case and place your pump inside, with the buttons facing out so you can see them through the plastic window.
(VO) JANE:
Make sure the syringe tip is lined up with the opening on the side of the case. Now you can zip it up!
When wearing your pump, make sure that you don't leave the infusion tubing hanging loose. It could get caught on something and pull out your cannula. Also check that the tubing isn't kinked or folded so the medication's flow isn't blocked.
(VO) JANE:
That's it for phase 5: Pump the Medication. Here's a quick summary. Feel free to pause the video if you'd like to review the steps, or go back if you'd like to re-learn this phase.
SUPER:
Let's review phase 5: Pump the Medication
- Follow the screen's prompts to start your pump
- Check the screen to confirm when the syringe is to be replaced
- Place your pump in its carrying case
JANE:
There are a few more things to go over. But before we move on, let's summarize the 5 Ps. First is the Plan It Out phase: the things you need to do before you use your supplies. Second, Prepare the Syringe. Transfer the medication from the vial into the syringe. Third, Prime the Tubing. Fill the infusion tubing with your medication, before connecting it to your cannula.
Fourth, Place the Cannula. Choose and clean a spot on your skin to insert the cannula and connect the tubing. And lastly, Pump the Medication. Start the pump, and the medication will flow. That's it for the 5 Ps!
SUPER:
Continuous Infusion phases: The 5 Ps
[icon] Plan It Out
[icon] Prepare the Syringe
[icon] Prime the Tubing
[icon] Place the Cannula
[icon] Pump the Medication
(VO) JANE:
You know how to set up your continuous infusion! Now let's go over a few more things.
SUPER:
Additions to Your Routine
JANE:
Like what to do when showering, how to get an extra dose, how to replace supplies, and more.
JANE:
First we'll learn how to stop and restart your pump. Then, we'll talk about how to replace your syringe.
We'll also look at how to disconnect and reconnect your pump. There are different sets of instructions for reconnecting, depending on if you've been disconnected for under 1 hour, or over 1 hour. Then, we'll look at how to replace the syringe, infusion tubing and cannula, which you'll do regularly. Next, we'll talk about changing the medication's flow rate, delivering an extra dose, and delivering a loading dose. Last, we'll learn about the different alarms and messages your pump may give you.
SUPER:
Additions to Your Routine:
- Stop and restart your pump
- Replace syringe only
- Disconnect and reconnect, if under 1 hour
- Replace infusion tubing and cannula, if over 1 hour
- Replace syringe, infusion tubing and cannula
- Flow Rate, Extra Dose and Loading Dose
- Pump alarms and messages
(VO) JANE:
You'll stop and restart your pump whenever you replace your supplies...
SUPER:
How to stop and restart your pump
JANE:
...or disconnect from the delivery system. But remember, if you stop your infusion for more than 1 hour, be sure to replace the cannula and infusion tubing, or they could get blocked up. We'll go over how to do that later on.
(VO) JANE:
To stop your pump, first turn on the pump display screen by pressing any button. Then press MENU. Highlight STOP PUMP and press SELECT. The screen will ask you to confirm that you want to stop the pump. Press YES.
(VO) JANE:
It'll stop your medication's flow. If done correctly, the pump will say “STOPPED” in red on the top right corner.
SUPER:
Pump status
(VO) JANE:
When you're ready to restart the pump again, press any button to turn the pump screen on. Press MENU, then highlight START PUMP. Press SELECT, then YES to confirm you want to start the pump again. That's it!
(VO) JANE:
Now we'll go over how to replace the syringe, but keep the same cannula and tubing you're already using.
SUPER:
How to replace the syringe only
JANE:
You'll need to change the syringe in your pump at least once every 24 hours. You may have to change it more often because the syringe is empty or nearly empty, depending on the dose prescribed by your healthcare provider. Before we get started, I'll share a few important notes. Since you're using the same tubing as before, you won't need to prime it.
SUPER:
Syringe must be changed at least every 24 hours
It's okay if there's some medication left in your syringe when it's time to replace it
(VO) JANE:
You'll want to start replacing your syringe about 30 minutes before the medication in your current syringe is due to run out.
SUPER:
Start preparing a new syringe at 30 minutes
JANE:
Check the countdown on your pump's screen. This way, you won't have to go without your medication while you get the next syringe ready.
JANE:
First, follow the Plan It Out phase instructions we went over at the start of this video.
SUPER:
Follow the Plan It Out phase
(VO) JANE:
That includes washing and drying your hands, getting your workspace ready, gathering and inspecting your supplies, and washing your hands a second time.
SUPER:
Plan It Out:
- Wash your hands for at least 20 seconds and dry with a new paper towel
- Get your workspace ready
- Gather and inspect your supplies
- Wash and dry your hands a second time
JANE:
The only difference this time, is that we won’t be needing a few things. So when you gather your supplies, you’ll only need your pump, syringe, medication vial, vial adapter, new paper towels, and alcohol pads.
SUPER:
You’ll need:
- Pump
- Syringe
- Medication vial
- Vial adapter
- New paper towels
- Alcohol pads
(VO) JANE:
Follow the steps we went over during the Prepare the Syringe phase earlier.
SUPER:
Follow the Prepare the Syringe phase
JANE:
This includes cleaning the vial top with an alcohol pad. In this step, you’ll transfer your medication into your syringe.
JANE:
Turn on your pump display screen by pressing any button. Press MENU to see a few options. Use the arrow keys to highlight CHANGE SUPPLIES. Press SELECT, then press YES. It will stop so you can replace the syringe. Follow the prompts to see the REMOVE SYRINGE menu. Press SELECT. Your pump will get the syringe ready to be removed. When it’s done, the display screen will let you know and then prompt you to open the lid.
(VO) JANE:
Slide the latch, and take out the old syringe. If you do not tell your pump that you’re replacing the syringe, your new syringe will not fit.
JANE:
Take the tubing off the old syringe. Attach it to the new syringe tip by pressing and turning it clockwise.
(VO) JANE:
Now we’ll place the new syringe inside your pump. Match the grooves and leave the tip out. Make sure it’s in place, and close the lid. You’ll hear a SNAP when it’s completely shut. That’s how you know you did it right.
(VO) JANE:
If the syringe doesn’t fit inside the pump groove, check to see if the syringe plunger rod pusher is advanced to the correct position and air has been removed. Be sure to discard the used syringe according to your local guidelines.
(VO) JANE:
The pump display screen will ask if the new syringe is in. Click YES, and it’ll prepare the new syringe for use. The screen will let you know when it’s ready, and will ask if you want to prime again. Click NO, since we didn’t replace the tubing. Make sure everything else is still connected. Then click YES to start the pump. That’s it!
(VO) JANE:
Next we’ll look at how to disconnect from your pump and then reconnect.
SUPER:
Disconnecting and reconnecting if it’s been under 1 hour
JANE:
Only use these instructions when you want to disconnect for less than 1 hour. This includes when you want to shower or swim. You can’t get in the water with your pump or tubing. They cannot get wet.
SUPER:
Reconnecting after less than 1 hour
(VO) JANE:
Let’s take a look at how to disconnect.
First, turn on the pump screen by pressing any button. Then press the MENU button. Highlight STOP PUMP. Click YES.
(VO) JANE:
Hold the cannula housing so it doesn’t move. Take the site connector end of your tubing, and gently squeeze the sides. Pull it straight out.
(VO) JANE:
Once the site connector is removed, lay it on a new paper towel. Gently tap the tubing at the site connector end. This will shake off any drops of medication, so it doesn’t get sticky.
(VO) JANE:
Wait 60 seconds. Then, to protect the site connector, replace the white cover that came with it.
SUPER:
[Clock Icon]
Wait 60 seconds
(VO) JANE:
And to protect yourself, attach the clean, transparent cannula cover, called the safeguard, that came with the insertion device. Insert the safeguard into the cannula. You’ll hear a CLICK! noise when it’s fully inserted. Keep the tubing and pump in a clean, dry place.
JANE:
Keep track of the time after you disconnect. There are different ways to reconnect depending on how long it’s been since you disconnected.
SUPER:
Make note of time you disconnect. There are different ways to reconnect depending on whether you’ve been disconnected under or over one hour.
JANE:
Here’s how to reconnect your pump and tubing if it’s been less than an hour since disconnecting.
SUPER:
[Clock Icon]
Less than 1 hour
(VO) JANE:
Remove the safeguard that’s plugging your cannula. Grab your tubing and take off the site connector’s cover. Now place a finger on the top of the cannula housing and push the site connector straight into the cannula, like this. You’ll hear another “CLICK” when it’s in.
(VO) JANE:
Grab your pump. Turn on the screen by pressing any button. Then press the MENU button. Select START PUMP from the options list. Press YES. That’s it! The pump will continue your infusion and count down the time left on your syringe.
(VO) JANE:
Before we move on, let’s see what to do if you’re trying to disconnect but your site connector is hard to remove from your cannula. Sometimes this can happen if the medication makes it sticky.
SUPER:
What to do if your site connector is stuck
(VO) JANE:
First, run a clean cloth under really warm water until it’s dripping wet.
SUPER:
If your site connector is stuck:
- Run a clean cloth under warm water
(VO) JANE:
Let the wet cloth soak on the site connector for at least 2 minutes to help dissolve the sticky medication. Gently rub the cloth, too.
SUPER:
If your site connector is stuck:
- Run a clean cloth under warm water
- Let it soak on the site connector for 2 minutes. Gently rub the cloth
(VO) JANE:
Then, squeeze the sides of the site connector and try to pull it out.
SUPER:
If your site connector is stuck:
- Run a clean cloth under warm water
- Let it soak on the site connector for 2 minutes. Gently rub the cloth
- Squeeze the sides of the site connector and try to pull it out
(VO) JANE:
If it’s still stuck, try soaking and applying the cloth again. If that doesn’t work, remove the cannula with the tubing attached. Replace it with a new cannula and tubing.
SUPER:
If it’s still stuck, try soaking and applying the cloth again. If that doesn’t work:
- Remove the cannula with the tubing attached
- Replace it with a new cannula and new tubing
If you need further help, call your doctor.
(VO) JANE:
You will have to replace your cannula and tubing if you’ve been disconnected from the pump for over an hour...
SUPER:
Replacing tubing and cannula (not syringe) if you’ve been disconnected for over 1 hour
JANE:
...or whenever you replace your cannula. Now let’s take a look at how to disconnect your cannula and infusion tubing. Then we’ll reconnect new ones. We won’t be replacing the syringe.
JANE:
First, follow the Plan It Out phase that we went over at the start of this video.
SUPER:
Follow the Plan It Out phase
(VO) JANE:
That includes washing and drying your hands, getting your workspace ready, gathering and inspecting your supplies, and washing your hands a second time.
SUPER:
Plan It Out:
- Wash your hands for at least 20 seconds and dry with a new paper towel
- Get your workspace ready
- Gather and inspect your supplies
- Wash and dry your hands a second time
JANE:
Gather your supplies—including the infusion set, alcohol pads, and new paper towels.
SUPER:
Gather new supplies:
- Infusion set
- Alcohol pads
- New paper towels
(VO) JANE:
First, turn on your pump display screen by pressing any button. Press MENU. If your pump is running, press SELECT to choose the STOP PUMP option. Then press YES.
(VO) JANE:
Then take the pump connector end of the tubing off the syringe tip. Turn it counterclockwise, and pull it off.
(VO) JANE:
Now, take out the cannula with the tubing still attached. Carefully loosen the tape from your skin, like you would when pulling off a bandage. Then pull the cannula housing away from your body to take it out.
JANE:
Once it’s removed, check the cannula and infusion site to ensure no parts of the cannula were left behind.
SUPER:
Dispose of these supplies properly based on your local guidelines.
JANE:
If you think the plastic part of the cannula was detached from the adhesive and is still under your skin, call your healthcare professional.
SUPER:
Contact your healthcare professional if you notice any skin changes at the infusion site, such as the spreading of redness, swelling, warmth, pain or discoloration when pressure is applied to the area.
(VO) JANE:
Next, attach your new tubing to the syringe tip. Twist clockwise until it’s snug. Don’t twist it too tight, though! Since you’re using new tubing, you’ll need to prime it, like we did earlier.
(VO) JANE:
Select MENU on your pump. Use the arrow keys to highlight CHANGE SUPPLIES and press SELECT. Highlight PRIME INFUSION LINE. Press SELECT, and CONFIRM.
(VO) JANE:
To finish priming the tubing, follow the steps we went over earlier in the Prime the Tubing phase. Don’t forget to tap the site connector and wait 60 seconds to avoid a sticky connector. Next, you’ll insert a new cannula into the skin of your belly and connect your tubing.
SUPER:
[check box] Follow the Prime the Tubing phase
(VO) JANE:
To do this, follow the steps we went over earlier in the Place the Cannula phase. Be sure to dispose of your insertion device properly in a sharps disposal container. Remember to choose an infusion site that is at least 1 inch from previous sites used in the last 12 days.
SUPER:
[check box] Follow the Prime the Tubing phase
[check box] Follow the Place the Cannula phase
(VO) JANE:
After that, you’re ready to start the pump again. The display screen will ask you to do this after you connect the tubing to the cannula. Press CONTINUE and then YES.
(VO) JANE:
Now let’s take a look at how to replace your syringe, infusion tubing, and cannula.
SUPER:
Replacing the syringe, infusion tubing and cannula
JANE:
Your pump will let you know when to change your syringe. You should start this process about 30 minutes before your medication is due to run out.
SUPER:
Start preparing a new syringe at 30 minutes
JANE:
Check the countdown on your pump’s screen. This way, you won’t have to go without your medication while you get the next syringe ready.
JANE:
First, follow the Plan It Out phase we went over at the start of this video.
SUPER:
Follow the Plan It Out phase
JANE:
That includes washing and drying your hands, taking your medication vial out and letting it sit at room temperature for 30 minutes if it was refrigerated, getting your workspace ready, gathering and inspecting your supplies, and washing your hands a second time.
SUPER:
Plan It Out:
- Wash and dry your hands
- If refrigerated, let your medication sit for 30 minutes before use
- Get your workspace ready
- Gather and inspect your supplies
- Wash and dry your hands again
JANE:
Then, follow the steps we went over during the Prepare the Syringe phase. In this step, you’ll get your medication ready for use in your syringe.
SUPER:
Follow the Prepare the Syringe phase
(VO) JANE:
Next, stop the pump. Turn on the screen by pressing any button. Press MENU, then SELECT to see the STOP PUMP menu. Click YES. You should see a red “STOPPED” in the upper right corner.
(VO) JANE:
Now we’ll take out the cannula with the tubing still attached. Carefully loosen the tape from your skin, like you would when pulling off a bandage. Then pull the cannula housing away from your body to pull it out.
(VO) JANE:
Once it’s removed, inspect the cannula and infusion site to ensure no parts of the cannula were left behind.
SUPER:
If you think the plastic part of the cannula is still under your skin, call your doctor.
(VO) JANE:
You’ll need to take the syringe out of the pump. Press MENU and highlight CHANGE SUPPLIES. Follow the prompts to see the REMOVE SYRINGE menu. Press SELECT.
(VO) JANE:
Your pump will now get the syringe ready to be removed. When it’s done, the screen will then ask you to open the lid. Slide the latch and take out the old syringe. Dispose of your used syringe and infusion set properly based on your local guidelines.
(VO) JANE:
The next few steps are all things we’ve done before. You’ll have to connect new tubing to the tip of your new syringe, and place the new syringe in your pump.
SUPER:
[check box] Follow the Prepare the Syringe phase
[check box] Follow the Prime the Tubing phase
[check box] Follow the Place the Cannula phase
(VO) JANE:
You’ll need to prime the tubing, since we’re using a new one.
(VO) JANE:
Remember to wipe the alcohol pad in an outward spiral, not back and forth, over your infusion site.
(VO) JANE:
Insert the new cannula, and make sure to stay at least 1 inch away from any previous sites used in the last 12 days.
(VO) JANE:
Then insert the site connector.
(VO) JANE:
The last step is to start your pump. After you connect the tubing, the screen will ask if you want to start. Press CONTINUE and then YES. That’s it! Now you know how to use your delivery system when different situations come up.
(VO) JANE:
Now we’ll talk about the infusion dose options you may have in your pump’s menu.
SUPER:
Flow Rate, Extra Dose and Loading Dose
JANE:
Dose options are different ways to change the amount of medication being infused. But keep in mind, you may not be able to use these options on your pump. It depends on how your doctor programmed it. If you’re not sure, give your doctor a call.
SUPER:
Call your doctor if you have questions about infusion dose options. Refer to your VYALEV Pump Patient Instructions for Use.
(VO) JANE:
The first option is to change your medication’s flow rate. The flow rate determines the amount of time one syringe is used and how much medication you’re receiving. Here’s how you do it. Go to MENU. Then select “Change Rate.”
SUPER:
Flow Rate = How fast your dose is administered
(VO) JANE:
The second option is to deliver an extra dose of medication. That means you’ll get a small amount of medication infused over a short amount of time.
(VO) JANE:
The third option is to deliver a loading dose of medication. A loading dose is a larger dose of your medication that flows more quickly than a typical dose. This is used when you first use your pump or when your pump has been off for at least 3 hours, if enabled by your doctor. They’ll set a lockout time for how often a loading dose can be administered.
JANE:
If these options are available for you, ask your doctor how and when you should use them. You can also refer to the Instructions for Use that came with your pump for more information.
SUPER:
Call your doctor if you have questions about infusion dose options.
(VO) JANE:
Let’s talk about the different messages and alarms your pump will give you.
SUPER:
Pump alarms and messages
JANE:
These are intended to alert you that you may need to do something. Here are some examples of alarms and messages you may see on your pump.
(VO) JANE:
Your pump will alert you when you have 2 hours left until your syringe runs out, and again when you have 45 minutes left on your syringe.
JANE:
At this point, you’ll want to remove your next medication vial from the fridge.
SUPER:
If refrigerated, remove 30 minutes before use
(VO) JANE:
It’ll alert you if your syringe is empty and needs to be replaced. It’ll also let you know when your syringe has been in the pump for 24 hours.
JANE:
Remember, the syringe and any unused medication should be thrown away after 24 hours.
SUPER:
Your syringe must be disposed of every 24 hours.
It's okay if there's some medication left in your syringe when it's time to replace it.
JANE:
There are many other types of alarms and messages that your pump may show you. Each is considered either “high” or “low” priority.
JANE:
Alarms that are “high priority” mean that your pump has stopped, and you’ll need to take action immediately. You’ll see a red caution symbol on your pump display screen for a high priority alarm. You’ll also hear a sound. Press “OK” on your pump to confirm you heard the alarm, and the sound will stop. Then, refer to your Pump Patient Instructions for Use to see how to fix the problem.
SUPER:
[icon] High priority = take action now
JANE:
Alarms that are “low priority” mean that you need to do something soon to prevent a “high priority” alarm later on. You’ll see a yellow caution symbol on your pump display screen for a low priority alarm. Each alarm is given for a particular reason and has its own unique sound.
SUPER:
[icon] High priority = take action now
[icon] Low priority = there may be a problem soon
JANE:
For a full list that describes what each alarm means and what you should do when they pop up, look at your pump’s Instructions for Use. Don’t interact with your delivery system while you’re operating motorized vehicles or machinery, or otherwise engaging in activities where distractions need to be avoided.
SUPER:
Find a full list of pump alarms and messages in your VYALEV Pump Patient Instructions for Use.
JANE:
We’re finished! That was a lot to learn. You can practice with your Nurse Ambassador until you feel prepared to do this at home.
SUPER:
Practice with your Nurse Ambassador until you feel prepared
JANE:
When challenges pop up, your VYALEV Complete dedicated support will be there to help you get back on track. Your Nurse Ambassador is happy to answer any questions as you go along.
JANE:
You can call the VYALEV Complete 24/7 Hotline any time, even when your Nurse Ambassador is not available. The Hotline is there whenever you need it.
SUPER:
Call the VYALEV Complete 24/7 Hotline at 1-866-489-2538
The 24/7 Hotline is staffed by nurses that are specifically trained on VYALEV and can be reached 24 hours per day, 7 days a week. After business hours, you may be asked to leave a message for a return call within 30 minutes.
JANE:
Remember, you can rely on VYALEV Complete. We’re always here to help.
SUPER:
VYALEV Complete 24/7 support
SUPER/VO:
IMPORTANT SAFETY INFORMATION
What is the most important safety information I should know about VYALEVTM (foscarbidopa/foslevodopa)?
Do not take VYALEV if you currently take or have recently taken (within the last 14 days) a medication for depression called a nonselective monoamine oxidase (MAO) inhibitor. Ask your healthcare provider or pharmacist if you are not sure if you take an MAO inhibitor.
Tell your healthcare provider about all your medical conditions and the medicines you take, including prescription and over-the-counter medicines, vitamins, and herbal supplements. When used together, VYALEV and certain other medicines, including medications for high blood pressure, MAO inhibitors, antipsychotics, metoclopramide, and isoniazid, may affect each other and cause serious side effects.
VYALEV may cause other serious side effects. Talk to your healthcare provider before starting VYALEV and while on VYALEV if you have had or have any of the following:
- Falling asleep without warning during normal daily activities. VYALEV may cause you to fall asleep while you are doing daily activities, such as driving, which may result in an accident. This can happen as late as 1 year after you start VYALEV. Do not drive or operate machinery until you know how VYALEV affects you. Tell your healthcare provider if you take medicines that can make you sleepy, such as sleep medicines, antidepressants, or antipsychotics.
- Seeing, hearing, or feeling things that are not real (hallucinations). This is a common and sometimes serious side effect.
- Unusual urges. Some people taking medicines for Parkinson’s disease, including VYALEV, have reported problems, such as gambling, compulsive eating, compulsive shopping, and increased sex drive.
- Infusion Site Reactions and Infections. Some people using VYALEV have had reactions and infections at the infusion site. This is a common and sometimes serious side effect. Remove your cannula and call your healthcare provider if you have any of the following symptoms of an infection: local spreading of redness, pain, swelling, warmth, change in color when pressing area, or fever. Take oral carbidopa/levodopa tablets until you are able to resume VYALEV.
- Uncontrolled sudden movements (dyskinesia). This is a common and sometimes serious side effect. If you have new dyskinesia or your dyskinesia gets worse, tell your healthcare provider. This may be a sign that your dose of VYALEV or other Parkinson’s medicines may need to be adjusted.
- Heart attack or other heart problems. Tell your healthcare provider if you have had increased blood pressure, a fast or irregular heartbeat, or chest pain.
- Worsening of the increased pressure in your eyes (glaucoma). The pressure in your eyes should be checked after starting VYALEV.
Do not stop using VYALEV or change your dose unless you are told to do so by your healthcare provider. Tell your healthcare provider if you develop withdrawal symptoms, such as fever, confusion, or severe muscle stiffness.
These are not all the possible side effects of VYALEV. For more information, ask your healthcare provider or pharmacist.
VYALEV (foscarbidopa and foslevodopa) injection for subcutaneous use is available in a 120 mg foscarbidopa and 2,400 mg foslevodopa per 10 mL (12 mg foscarbidopa and 240 mg foslevodopa per mL) solution.
Please see the full Prescribing Information, including Medication Guide, for additional information about VYALEV. Talk to your healthcare provider if you have questions.
You are encouraged to report negative side effects of prescription drugs to the FDA. Visit www.fda.gov/medwatch or call 1-800-FDA-1088.
If you are having difficulty paying for your medicine, AbbVie may be able to help. Visit AbbVie.com/PatientAccessSupport to learn more.
SUPER:
[AbbVie Logo]
© 2024 AbbVie. All rights reserved.
All trademarks are the property of their respective owners.
US-LEVCAR-220034 2024
Please see Important Safety Information included in this video. Please see Instructions For Use, and full Prescribing Information, along with Medication Guide, which was provided with your pump.
How to Use Your VYALEV Delivery System
Learn step-by-step instructions for administering your treatment at home. Take time to review what your doctor has taught you whenever you need a reminder.
Watch this video to:
- Go over the 5 Ps of administration
- See how to stop and restart your pump
- Learn how to disconnect and reconnect
- See how to replace the supplies for your delivery system
- Review your pump settings, alarms, and messages
Length: 47:24 minutes